

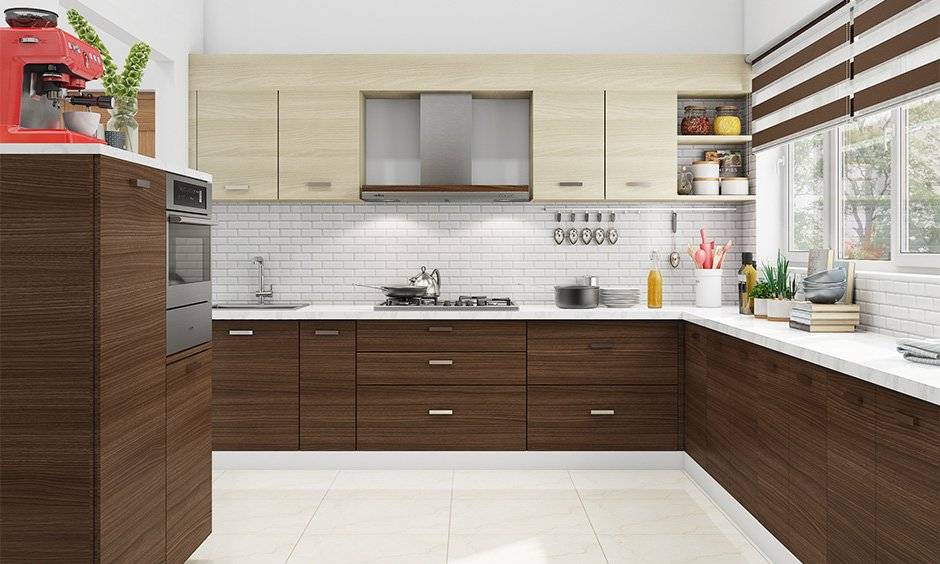
A compact kitchen can feel like a daily logistical puzzle. Between bulky appliances, oversized cookware, food supplies, and limited countertop prep space, a tight footprint often leads to frustrating clutter and inefficiency. However, square footage alone does not dictate the functionality or visual appeal of a kitchen. With deliberate space planning, clever cabinet organization, and intelligent layout strategies, even the smallest kitchen can feel spacious, efficient, and enjoyable to work in.
Maximizing a small kitchen requires looking beyond basic cabinet storage and treating every surface, vertical wall, and neglected corner as functional space. This guide explores practical design principles, storage innovations, appliance selection guidelines, and organizational techniques to help you unlock the full potential of your compact kitchen.
Fundamental Space-Saving Layout Strategies
When working with a small footprint, the arrangement of your major work zones, known as the kitchen work triangle (connecting the sink, refrigerator, and stovetop), sets the foundation for ease of movement.
1. The Single-Wall Kitchen
Common in urban apartments and studio spaces, the single-wall layout places all appliances, cabinetry, and counter spaces along one continuous wall.
-
Space Strategy: Extend upper cabinets up to the ceiling line to maximize vertical capacity. Use a portable rolling island or a drop-leaf wall table opposite the main wall to gain extra prep space when cooking.
2. The Galley Layout
A galley kitchen features two parallel walls of cabinets and appliances separated by a central walkway. Chefs often consider this layout highly efficient because movement between prep areas requires minimal steps.
-
Space Strategy: Keep high-traffic appliances like the refrigerator and sink on opposite walls to avoid bottleneck points. Choose light-colored cabinet finishes or open shelving on one wall to prevent the hallway from feeling enclosed or narrow.
3. The L-Shaped Layout
An L-shaped design uses two perpendicular walls, making it ideal for open-plan living areas or small square rooms.
-
Space Strategy: Focus on utilizing the corner junction effectively with dedicated corner cabinet hardware. Keep the open side of the room free of tall dividers to maintain an airy feel throughout the space.
Utilizing Vertical Wall Space and Overhead Storage
Floor space is fixed, but vertical wall space is often underutilized. Elevating storage upward frees up precious countertop acreage.
-
Ceiling-Height Cabinetry: Standard upper cabinets leave a gap between the top shelf and the ceiling that collects dust. Replacing them with extra-tall 42-inch upper cabinets or adding a secondary row of upper soffit boxes adds storage for seasonal cookware, festive serving platters, and bulk supplies.
-
Open Shelving Units: Replacing a section of heavy upper cabinets with floating wall shelves creates depth and visually expands narrow walls. Use floating shelves for daily items like coffee mugs, dinner plates, and spices so items stay accessible while contributing to open visual lines.
-
Magnetic Tool Strips and Pegboards: Mounting a heavy-duty magnetic knife strip onto the backsplash eliminates the need for a bulky countertop knife block. Similarly, an industrial wall pegboard provides customizable hanging points for pots, pans, measuring cups, and colanders.
-
Hanging Pot Racks: Suspending a pot rack above a kitchen island or along a vacant wall removes large, awkward pots and cast iron skillets from lower cabinet drawers.
Transforming Cabinet and Drawer Interiors
A small kitchen often has enough cabinet volume, but poor internal organization wastes space. Installing specialized pull-out hardware ensures every cubic inch works efficiently.
1. Eliminating Blind Corners with Rotating Hardware
Standard corner cabinets create deep, dark blind spots where items get lost. Install Lazy Susans or swing-out kidney shaped trays to bring stored items out into the light with a simple turn.
2. Roll-Out Shelving and Deep Drawers
Fixed cabinet shelves force you to stack items on top of each other, making things at the back hard to reach. Converting lower base cabinets into deep roll-out drawers lets you view and access all contents from above without bending or kneeling.
3. Vertical Tray Dividers
Storing baking sheets, cutting boards, muffin tins, and serving trays flat on top of one another creates unstable stacks. Install vertical tray dividers in narrow base cabinets or above the refrigerator to slide pans in vertically, making individual items easy to grab.
4. Under-Sink Organizers
The space beneath the kitchen sink is notoriously tricky due to drain pipes and disposal units. Use two-tier expandable shelf organizers, pull-out wire baskets, and door-mounted sponge caddies to keep dish soap, cleaning sprays, and trash bags neatly contained.
Selecting Appliances for Small Kitchens
Standard American appliances are designed for large suburban homes and can easily overpower a compact room. Choosing compact or multifunctional appliances maintains performance while saving floor space.
-
Slimline Refrigerators: Standard refrigerators measure 36 inches wide and up to 34 inches deep. Opt for a European-style counter-depth refrigerator measuring 24 to 30 inches wide. These units align flush with base cabinets, preventing protrusion into narrow walkways.
-
18-Inch Dishwashers: Standard dishwashers take up 24 inches of base cabinet width. An 18-inch model saves six inches of horizontal space while holding up to eight place settings, making it ideal for small households.
-
Induction Cooktops: Smooth glass induction cooktops provide rapid heating and precise control. When not in use, the flat glass surface doubles as an extended prep space for cutting boards and mixing bowls.
-
Over-the-Range Microwave and Vent Hoods: Combining a microwave with an integrated range vent hood clears up valuable counter space that a countertop microwave would otherwise occupy.
-
Multifunctional Countertop Appliances: Swap single-use appliances for multi-functional appliances, such as a combination air fryer and toaster oven or a multi-cooker that functions as a pressure cooker, slow cooker, and rice steamer.
Countertop Optimization and Flexible Surface Options
Maximizing prep space requires creative thinking about temporary and foldable work surfaces.
-
Over-the-Sink Cutting Boards: Specially fitted wood or composite cutting boards sit across the rim of your kitchen sink, instantly turning the sink basin into an active prep station.
-
Drop-Leaf Wall Tables: A wall-mounted drop-leaf table folds flat against the wall when not in use and lifts into a sturdy surface for quick meals or prep work.
-
Rolling Kitchen Carts: A narrow rolling island cart equipped with locking caster wheels, drawer storage, and a butcher block top provides extra work space when cooking and tucks into a pantry corner when not needed.
-
Appliance Garages: Tuck small electrics like blenders and toasters inside an appliance garage equipped with a roll-up tambour door. Keeping counter surfaces clear of minor clutter makes the room feel significantly larger.
Visual Design Tricks to Make Small Kitchens Feel Larger
Beyond physical storage, subtle visual design choices can make a tight space feel open and light.
-
Reflective Finishes and Glass: High-gloss cabinet doors, polished quartz countertops, and mirrored or glass tile backsplashes reflect natural light around the room, creating an illusion of depth.
-
Monochromatic Color Palettes: Using consistent light colors across cabinets, walls, and countertops removes visual breaks. Soft whites, creamy off-whites, warm taupes, and light grays help walls recede visually.
-
Integrated Cabinet Handles: D-shaped handles and large knobs interrupt visual lines in tight spaces. Choose integrated edge pulls, push-to-open cabinet catches, or recessed channels to keep door faces smooth and uncluttered.
-
Strategic Lighting Layering: A single central ceiling fixture leaves corners in shadow, making the room feel smaller. Layer your lighting using under-cabinet LED strip lights, recessed ceiling spotlights, and low-profile pendant lights to illuminate all work zones evenly.
Frequently Asked Questions
1. What is the minimum recommended aisle width for a small kitchen walkway?
Building codes and kitchen design standards recommend a minimum walkway width of 36 inches for a single-cook kitchen. For spaces where two people routinely cook together, aim for 42 to 48 inches of aisle space to allow cabinet doors, dishwasher racks, and oven doors to open fully without blocking movement.
2. How can I add extra storage if I am renting and cannot modify cabinets?
Renters can add storage using non-permanent solutions such as tension rods placed inside cabinets to hold cutting boards, freestanding wire shelf risers to double stack plates, magnetic fridge-side racks for spices, and over-the-door storage organizers for pantry doors.
3. Are open shelves practical for a small kitchen that gets dusty or greasy?
Open shelves are practical if you use them for items that are washed and rotated daily, such as dinner plates, coffee mugs, and water glasses. To prevent grease accumulation, position open shelving away from the immediate cooking splash zone of the stovetop and ensure your range hood vents effectively to the outside.
4. How do I organize a small pantry with deep, narrow shelves?
Use clear, stackable airtight canisters for dry goods like flour, pasta, and rice to maximize vertical shelf height. Group smaller items like cans, snack pouches, and baking supplies into pull-out plastic bins or clear acrylic turntables so you can retrieve items from the back without knocking over front items.
5. What type of sink is best for a small kitchen setup?
A single-basin, deep undermount sink is generally better for a small kitchen than a double-basin sink. A deep single basin accommodates large stockpots, baking sheets, and frying pans easily, and undermount installation allows you to sweep counter debris directly into the basin without catching on a raised rim.
6. Can I install a kitchen island in a small, narrow space?
Yes, but you must choose an appropriately scaled island. Instead of a fixed built-in cabinet island, select a narrow mobile work cart or a slender console table with an open base. Ensure you maintain at least 36 inches of open clearance around all four sides of the island for safe movement.
7. How do I manage trash and recycling bins when floor space is limited?
Avoid freestanding trash cans that block floor walkways. Instead, install a dual pull-out trash and recycling hardware kit inside a 15-inch or 18-inch base cabinet, or use a door-mounted trash bin that hangs on the inside of the cabinet door beneath the sink.

Comments are closed.